


Padlet to showcase your favorite tessellation or circular mandala- choose one : )
Period 1
Period 2
Period 3
Period 5
Period 6
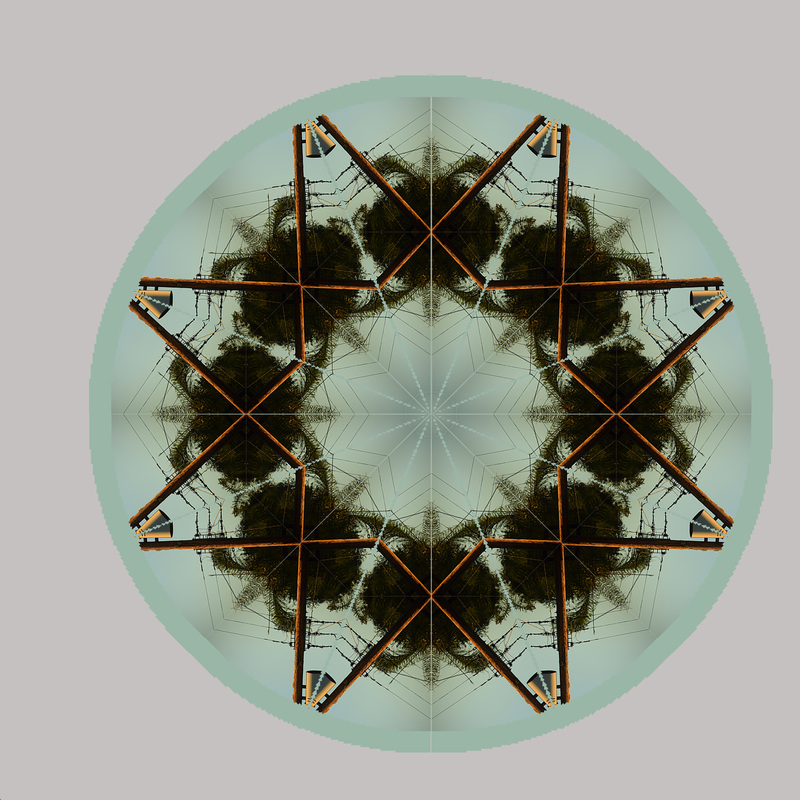
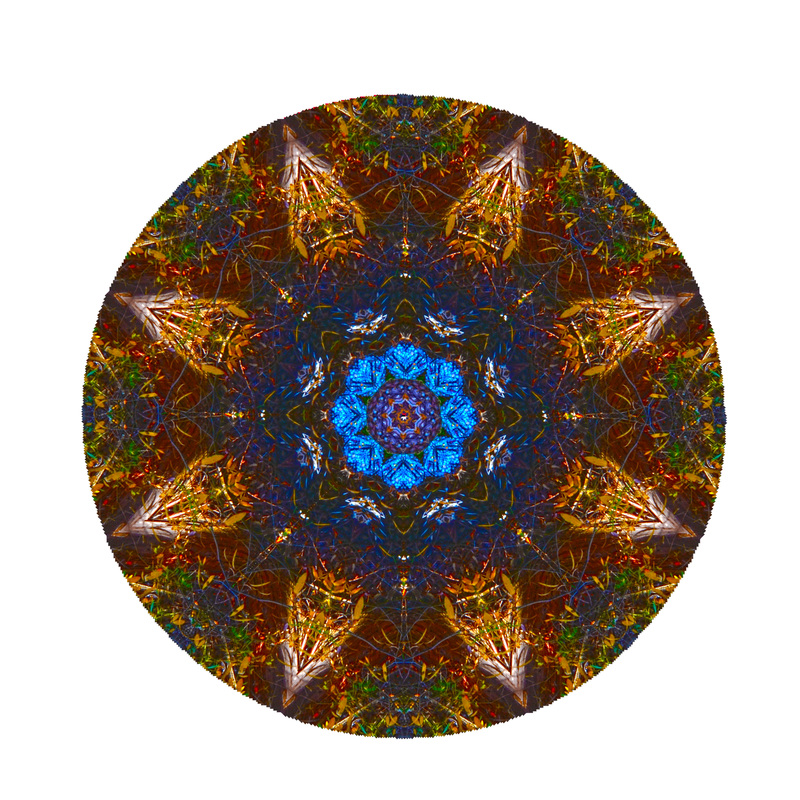
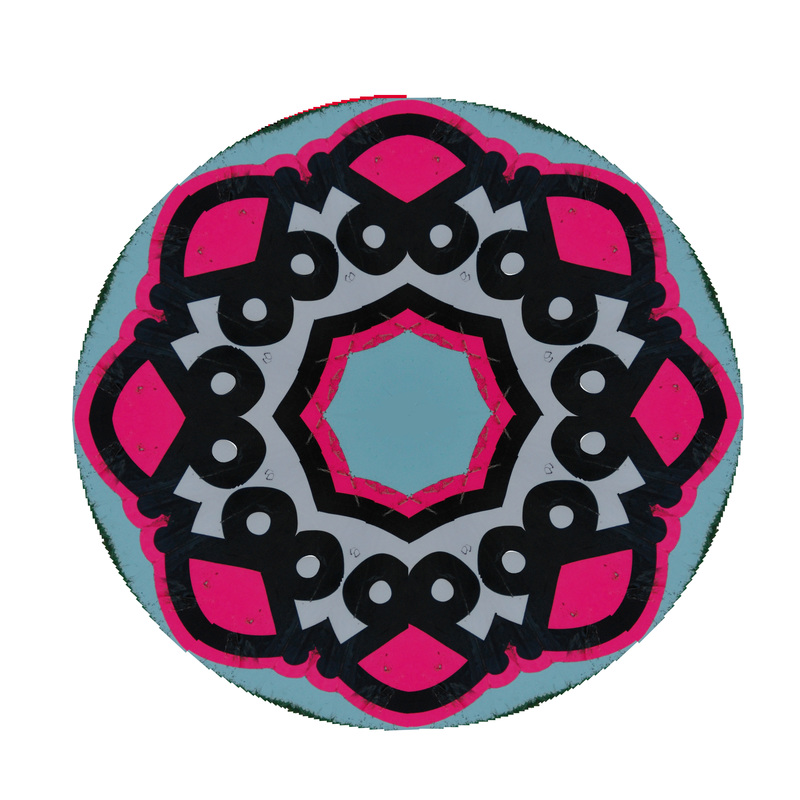
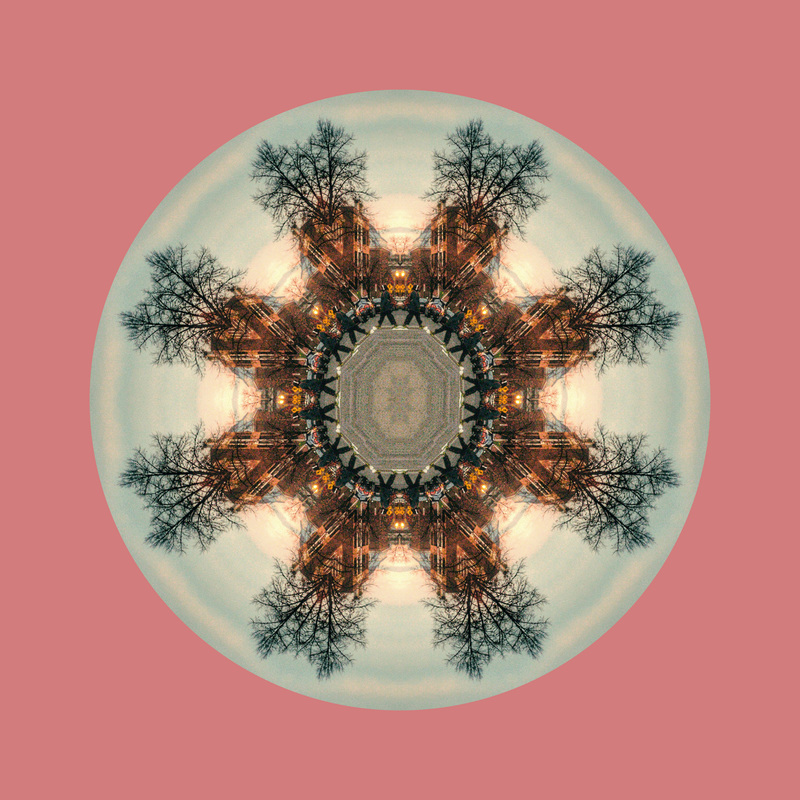
Circular Mandala-
Have two tabs open for Photoshop-
On the mandala template-
1. Select the pie layer
2. Use the magic wand tool on the top red pie area and press click to select the red area
3. Drag that select size over to the photograph you are using and choose an area you want to copy.
4. Press command + c to copy the area on the source photograph.
5. Go back to the template and press command + v to paste the selection onto the red area.
6. Go back to the pie layer and use the magic wand on the black pie area. Press command + v to paste the photograph into that space.
7. Press edit- transform- flip horizontal so it’s the symmetrical image of the first layer.
8. Press edit- transform- rotate to get it into the proper place. Make sure it lines up perfectly! It takes time!
9. Once it’s lined up perfectly, press command + click on both the layers.
10. Press layer- group layers to group them as one.
11. If there is still a part of the second pie left (black space on the left), edit- transform-scale to cover it.
10. Once both the second and first pie area is covered perfectly, press layer- duplicate group.
11. Move that group to the second part of the red and black pie by pressing the move tool and edit- transform- rotate.
12. Once that area is perfectly set up, group all those layers together by pressing each layer and layer- group layers.
13. Duplicate that layer by pressing layer- duplicate layer.
14. Move that layer over to the right side and edit- transform- flip horizontal. Line up perfectly.
15. Group those layers together by pressing both layer thumbnails then layer- group groups.
16. Duplicate the group by pressing layer- duplicate group.
17. Move the group down, and press edit- transform- flip vertical.
18. Move the group to where it needs to go to line up with the top half of the mandala.
19. When you’re done merge all the layers- yay!
For Video on how to create a tessellation.
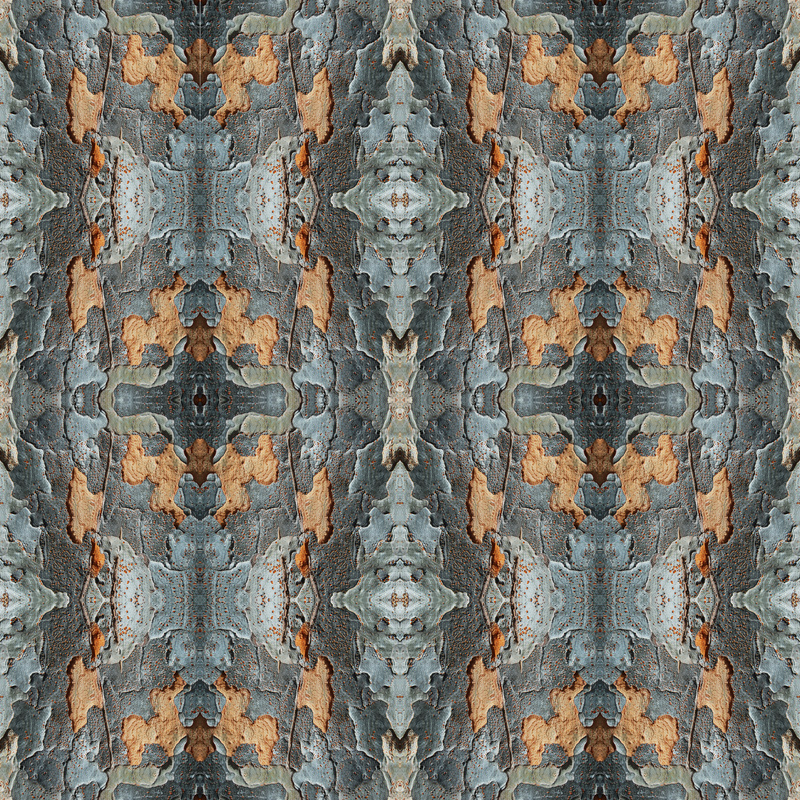
A tessellation is created when a shape is repeated over and over again covering a plane without any gaps or overlaps. Another word for a tessellation is a tiling.
To create a tessellation, do these steps in order:
1. Go to file>new> custom from the drag down menu.
2. Create an 8" high x 8" wide document with 300 resolution.
3. Create grid line markers at the 4" wide and 4" tall area by dragging from the rulers. If you are not able to view the rulers, press view > view ruler and check next to it.
4. Save as Tessellation 8 inch template in Photoshop or Jpeg on your desktop.
*** for the 2" template, follow steps 1 & 2 and create grids at the 2", 4", and 6" markers.
You can make the guidelines exact by pressing
view- new guide- horizontal 2 inch, then view- new guide- horizontal 4 inch, view, new guide- horizontal 6 inch, then view- new guide- vertical 2 inches, view- new guide- vertical 4 inches, view- new guide- vertical 6 inches
5. Choose a photograph that you think may look good as a tessellation from iPhoto. Tree branches, flowers, etc work well.
6. Drag that photo into the icon for Photoshop as a new file. (Do not drag it on top of the mandala until you've cropped it to the correct size using the steps below!)
7. Crop within the image to a square. Use the option on the top left side to change it from "unconstrained" to 1 x 1 square.
8. Edit the size of the image by pressing image > image size and change to 4" wide and 4" height, 300 resolution.
9. For the sample- drag the image of the original cropped photo using the move tool to the mandala template and position it in the top left hand corner.
10. Duplicate the layer by going layer> duplicate layer.
11. Move the top duplicate layer to the right side and change how it's positioned by going edit> transform > flip horizontal.
12. Go back to layer one and layer >duplicate layer again.
13. Move the next duplicate layer from the top left hand side to the bottom left corner and press edit> transform> flip vertical.
14. Highlight layer one again and layer> duplicate layer for the third time.
15. Move the layer to the bottom right hand side and edit > transform > flip horizontal and then edit >transform > flip vertical. You may have to adjust it to make a geometric pattern in the center.
16. Move the guide using the move tool to make sure there's no white areas. If there are, reposition the images so they overlap slightly. Again, make sure that all the layers are copied from the original layer to make sure they're the same size.
17. When they look best, merge the layers by pressing layer > merge visible and then adjust the brightness/contrast as needed.
18. ***For your fourth mandala, resize your image to 2" square and create a new document that is 8" square and grid it out into 2" squares. Put your images within that canvas (see my example above).
19. Save as a jpeg and save as lastname.firstname.mandala1, 2, 3, 4*** (do four total) in the shared folder in the common drive- rbv-class1 > 231Common > Period# > 01-23-2016 Tessellations.
20. When you are done, create a new blog post on your website called "Tessellations" and put your four finished tessellations and the original photograph that you used to create each one. Explain the following:
1. What tessellation means.
2. How you created the mandala in your own words- so that you can recreate it on your own two years from now. Do not cut and paste the instructions from this website!
3. Any struggles you had making this project
4. What you are most proud of making this project.
For my second year students- here is the information on how to create a circular mandala.
Here are two other tutorials to get the mandala
http://www.earthmandalas.com/how/
youtube tutorial
Circular Mandala-
Video on creating one
Have two tabs open for Photoshop-
1. Select the pie layer on the top left hand side
2. Use the magic wand tool on the pie area and press click to select the area
3. Drag that select size over to the photograph you are using and choose an area you want to copy.
4. Press command + c to copy the area on the source photograph.
5. Go back to the template and press command + v to paste the selection onto the pie area.
6. Go to layer- duplicate layer and move it to the second pie area to the left side.
7. Press edit- transform- flip horizontal so it’s the symmetrical image of the first layer.
8. Press edit- transform- rotate to get it into the proper place. Make sure it lines up perfectly! It takes time!
9. Once it’s lined up perfectly, press command + click on both the layers.
10. Press layer- merge layers to group them as one.
11. If there is still a part of the second pie left (black space on the left), edit- transform-scale to cover it.
10. Once both the second and first pie area is covered perfectly, press layer- duplicate layer.
11. Move that layer to the second left part of the pie by pressing the move tool and edit- transform- rotate.
12. Once that area is perfectly set up, merge those layers together by selecting the layer thumbnails, pressing command-click and press layer- merge layers.
13. Duplicate that layer by pressing layer- duplicate layer.
14. Move that layer over to the right side and edit- transform- flip horizontal. Line up perfectly.
15. Merge those layers together by pressing both layer thumbnails then layer- merge layer.
16. Duplicate the layer by pressing layer- duplicate layer.
17. Move the layer down, and press edit- transform- flip vertical.
18. Move the layer to where it needs to go to line up with the top half of the mandala.
19. When you’re done merge all the layers and delete the layer with the pie template so there's no lines showing- yay!
20. To get a color in the background, select the background layer, use the paint bucket tool, choose a color from the palette, and click on a blank area. Voila!
Graded based on:
5 points: Photographs focused, exposure is correct, no dust in the sky
5 points: Time on task- each day working hard, excellent citizenship
5 points: Computer work- sized correctly, geometric pattern in the middle, no lines between the quadrants, saved as lastname-firstname-mandala1,2,3,4.jpg in the appropriate folder, three are 4" squares and one is a 2" square.
5 points: Blog post- answered all questions in complete sentences, put your finished pieces up along with the original photographs.
Period 1
Period 2
Period 3
Period 5
Period 6
Circular Mandala-
Have two tabs open for Photoshop-
- The mandala PSD template
- The photograph that you are using as a source for your mandala
On the mandala template-
1. Select the pie layer
2. Use the magic wand tool on the top red pie area and press click to select the red area
3. Drag that select size over to the photograph you are using and choose an area you want to copy.
4. Press command + c to copy the area on the source photograph.
5. Go back to the template and press command + v to paste the selection onto the red area.
6. Go back to the pie layer and use the magic wand on the black pie area. Press command + v to paste the photograph into that space.
7. Press edit- transform- flip horizontal so it’s the symmetrical image of the first layer.
8. Press edit- transform- rotate to get it into the proper place. Make sure it lines up perfectly! It takes time!
9. Once it’s lined up perfectly, press command + click on both the layers.
10. Press layer- group layers to group them as one.
11. If there is still a part of the second pie left (black space on the left), edit- transform-scale to cover it.
10. Once both the second and first pie area is covered perfectly, press layer- duplicate group.
11. Move that group to the second part of the red and black pie by pressing the move tool and edit- transform- rotate.
12. Once that area is perfectly set up, group all those layers together by pressing each layer and layer- group layers.
13. Duplicate that layer by pressing layer- duplicate layer.
14. Move that layer over to the right side and edit- transform- flip horizontal. Line up perfectly.
15. Group those layers together by pressing both layer thumbnails then layer- group groups.
16. Duplicate the group by pressing layer- duplicate group.
17. Move the group down, and press edit- transform- flip vertical.
18. Move the group to where it needs to go to line up with the top half of the mandala.
19. When you’re done merge all the layers- yay!
For Video on how to create a tessellation.
A tessellation is created when a shape is repeated over and over again covering a plane without any gaps or overlaps. Another word for a tessellation is a tiling.
To create a tessellation, do these steps in order:
1. Go to file>new> custom from the drag down menu.
2. Create an 8" high x 8" wide document with 300 resolution.
3. Create grid line markers at the 4" wide and 4" tall area by dragging from the rulers. If you are not able to view the rulers, press view > view ruler and check next to it.
4. Save as Tessellation 8 inch template in Photoshop or Jpeg on your desktop.
*** for the 2" template, follow steps 1 & 2 and create grids at the 2", 4", and 6" markers.
You can make the guidelines exact by pressing
view- new guide- horizontal 2 inch, then view- new guide- horizontal 4 inch, view, new guide- horizontal 6 inch, then view- new guide- vertical 2 inches, view- new guide- vertical 4 inches, view- new guide- vertical 6 inches
5. Choose a photograph that you think may look good as a tessellation from iPhoto. Tree branches, flowers, etc work well.
6. Drag that photo into the icon for Photoshop as a new file. (Do not drag it on top of the mandala until you've cropped it to the correct size using the steps below!)
7. Crop within the image to a square. Use the option on the top left side to change it from "unconstrained" to 1 x 1 square.
8. Edit the size of the image by pressing image > image size and change to 4" wide and 4" height, 300 resolution.
9. For the sample- drag the image of the original cropped photo using the move tool to the mandala template and position it in the top left hand corner.
10. Duplicate the layer by going layer> duplicate layer.
11. Move the top duplicate layer to the right side and change how it's positioned by going edit> transform > flip horizontal.
12. Go back to layer one and layer >duplicate layer again.
13. Move the next duplicate layer from the top left hand side to the bottom left corner and press edit> transform> flip vertical.
14. Highlight layer one again and layer> duplicate layer for the third time.
15. Move the layer to the bottom right hand side and edit > transform > flip horizontal and then edit >transform > flip vertical. You may have to adjust it to make a geometric pattern in the center.
16. Move the guide using the move tool to make sure there's no white areas. If there are, reposition the images so they overlap slightly. Again, make sure that all the layers are copied from the original layer to make sure they're the same size.
17. When they look best, merge the layers by pressing layer > merge visible and then adjust the brightness/contrast as needed.
18. ***For your fourth mandala, resize your image to 2" square and create a new document that is 8" square and grid it out into 2" squares. Put your images within that canvas (see my example above).
19. Save as a jpeg and save as lastname.firstname.mandala1, 2, 3, 4*** (do four total) in the shared folder in the common drive- rbv-class1 > 231Common > Period# > 01-23-2016 Tessellations.
20. When you are done, create a new blog post on your website called "Tessellations" and put your four finished tessellations and the original photograph that you used to create each one. Explain the following:
1. What tessellation means.
2. How you created the mandala in your own words- so that you can recreate it on your own two years from now. Do not cut and paste the instructions from this website!
3. Any struggles you had making this project
4. What you are most proud of making this project.
For my second year students- here is the information on how to create a circular mandala.
Here are two other tutorials to get the mandala
http://www.earthmandalas.com/how/
youtube tutorial
Circular Mandala-
Video on creating one
Have two tabs open for Photoshop-
- The mandala PSD template
- The photograph that you are using as a source for your mandala
1. Select the pie layer on the top left hand side
2. Use the magic wand tool on the pie area and press click to select the area
3. Drag that select size over to the photograph you are using and choose an area you want to copy.
4. Press command + c to copy the area on the source photograph.
5. Go back to the template and press command + v to paste the selection onto the pie area.
6. Go to layer- duplicate layer and move it to the second pie area to the left side.
7. Press edit- transform- flip horizontal so it’s the symmetrical image of the first layer.
8. Press edit- transform- rotate to get it into the proper place. Make sure it lines up perfectly! It takes time!
9. Once it’s lined up perfectly, press command + click on both the layers.
10. Press layer- merge layers to group them as one.
11. If there is still a part of the second pie left (black space on the left), edit- transform-scale to cover it.
10. Once both the second and first pie area is covered perfectly, press layer- duplicate layer.
11. Move that layer to the second left part of the pie by pressing the move tool and edit- transform- rotate.
12. Once that area is perfectly set up, merge those layers together by selecting the layer thumbnails, pressing command-click and press layer- merge layers.
13. Duplicate that layer by pressing layer- duplicate layer.
14. Move that layer over to the right side and edit- transform- flip horizontal. Line up perfectly.
15. Merge those layers together by pressing both layer thumbnails then layer- merge layer.
16. Duplicate the layer by pressing layer- duplicate layer.
17. Move the layer down, and press edit- transform- flip vertical.
18. Move the layer to where it needs to go to line up with the top half of the mandala.
19. When you’re done merge all the layers and delete the layer with the pie template so there's no lines showing- yay!
20. To get a color in the background, select the background layer, use the paint bucket tool, choose a color from the palette, and click on a blank area. Voila!
Graded based on:
5 points: Photographs focused, exposure is correct, no dust in the sky
5 points: Time on task- each day working hard, excellent citizenship
5 points: Computer work- sized correctly, geometric pattern in the middle, no lines between the quadrants, saved as lastname-firstname-mandala1,2,3,4.jpg in the appropriate folder, three are 4" squares and one is a 2" square.
5 points: Blog post- answered all questions in complete sentences, put your finished pieces up along with the original photographs.
 RSS Feed
