David Muro, Class of 2015
The Layer Mask is the Photoshop Guru’s alternative to the Eraser tool. The Eraser tool is a destructive technique, whereas a Layer Mask can be easily corrected or removed altogether.
The basic principle behind Layer Masks is black is see through and white is solid, so whatever area of your mask is black will effectively be "erased" from the image, unless you want it back, in which case you would just paint it white instead.
Click the Add Layer Mask icon at the bottom of the Layers palette to add a mask. A common technique is to use the brush tool to paint out the background of an image just as you would with the eraser tool.
See a video on how to do this project here
Steps:
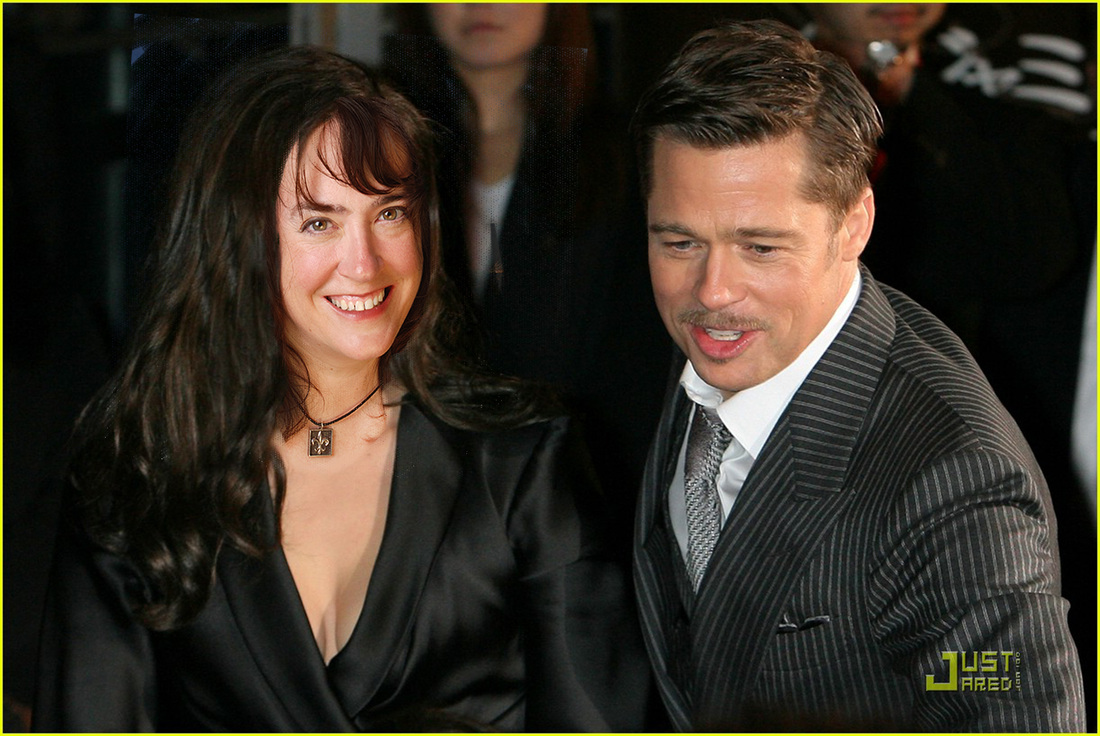
1. Download both the Brad and Angelina and the headshot images from RBVClass-1 and period# folder and open up in Photoshop.
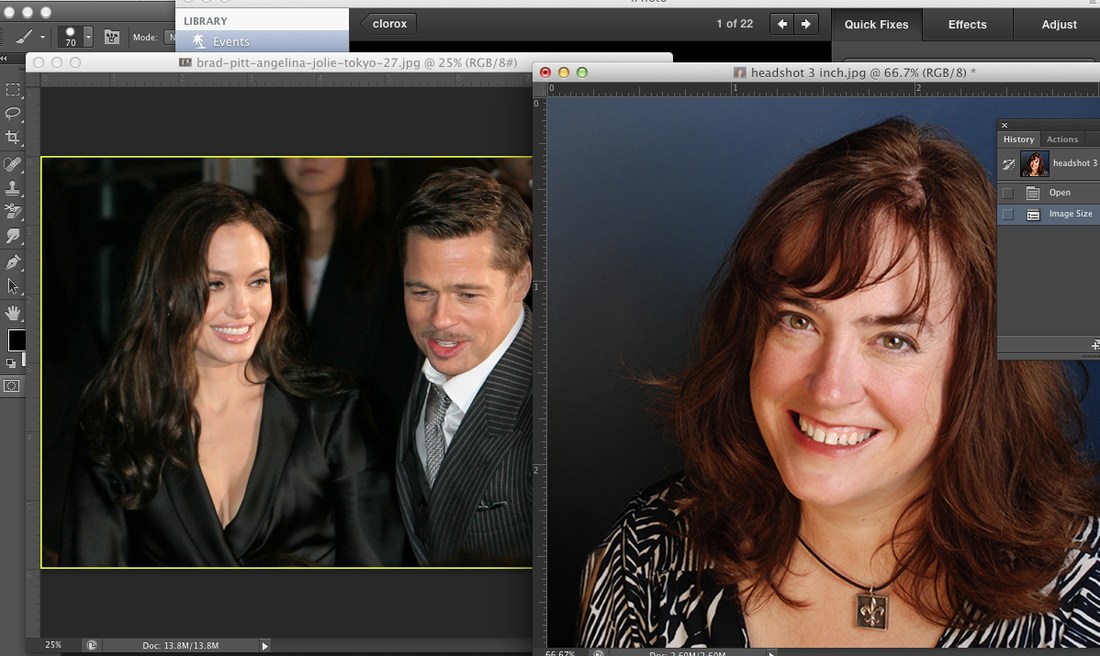
2. Once they are open in Photoshop, make sure that they are both 300 resolution by selecting
Image > Image Size. You want to be sure they are both that size so that the image is clear enough for printing.
3. Move the headshot image to the side of the Photoshop workspace by clicking on the title and dragging it to the side.
The basic principle behind Layer Masks is black is see through and white is solid, so whatever area of your mask is black will effectively be "erased" from the image, unless you want it back, in which case you would just paint it white instead.
Click the Add Layer Mask icon at the bottom of the Layers palette to add a mask. A common technique is to use the brush tool to paint out the background of an image just as you would with the eraser tool.
See a video on how to do this project here
Steps:
1. Download both the Brad and Angelina and the headshot images from RBVClass-1 and period# folder and open up in Photoshop.
2. Once they are open in Photoshop, make sure that they are both 300 resolution by selecting
Image > Image Size. You want to be sure they are both that size so that the image is clear enough for printing.
3. Move the headshot image to the side of the Photoshop workspace by clicking on the title and dragging it to the side.
4. Use the lasso tool to select the head, neck and hair. Make sure that both ends of the lasso touch to get the marching ants. Move the lassoed image onto the Brad and Angelina photo by clicking on the MOVE tool and dragging it to the top of Angelina's face.
5. Change the OPACITY of the headshot by clicking by the thumbnails of the layers and change it to 60%.
6. Flip the headshot face to match the direction of Angelina's face by pressing EDIT> TRANSFORM > FLIP HORIZONTAL.
7. Change the scale as needed to make it bigger or smaller by pressing EDIT > TRANSFORM > SCALE. Press the "SHIFT" button while you are using the SCALE tool so that the proportions stay the same.
8. Change the rotation as needed to make the chin fit better by pressing EDIT > TRANSFORM > ROTATE
9. Change the opacity of the top layer back to 100% by going back to the layer thumbnails.
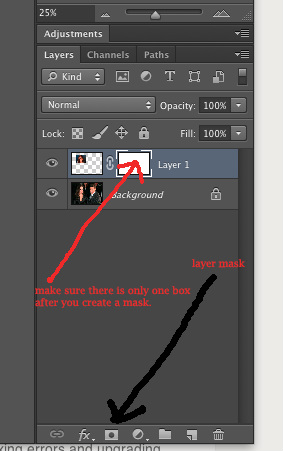
10. Select the MASK tool at the bottom of the layer thumbnails- it looks like a rectangle with a circle in it. Be sure that there are now TWO thumbnails in the top layer.
5. Change the OPACITY of the headshot by clicking by the thumbnails of the layers and change it to 60%.
6. Flip the headshot face to match the direction of Angelina's face by pressing EDIT> TRANSFORM > FLIP HORIZONTAL.
7. Change the scale as needed to make it bigger or smaller by pressing EDIT > TRANSFORM > SCALE. Press the "SHIFT" button while you are using the SCALE tool so that the proportions stay the same.
8. Change the rotation as needed to make the chin fit better by pressing EDIT > TRANSFORM > ROTATE
9. Change the opacity of the top layer back to 100% by going back to the layer thumbnails.
10. Select the MASK tool at the bottom of the layer thumbnails- it looks like a rectangle with a circle in it. Be sure that there are now TWO thumbnails in the top layer.
11. Choose the PAINTBRUSH tool (sometimes it's hidden under the pencil tool) and change the top color rectangle to BLACK. You can switch it from black to white by pressing the arrow key just above the rectangles.

12. Use the paintbrush just like an eraser to take away information from the top layer. Since it is a MASK, there is still information where you put down a mask (unlike a destructive way of doing it like an eraser).
13. To make the paintbrush smaller, press the [ button on the keyboard (under the delete button). To make it
larger, press the ] button.
14. You can see where you painted a mask on the second thumbnail for that layer.
15. If you went too far and need to go back and show part of the original layer, switch the color to WHITE and paint over the area you want to show again.
16. Once you are happy with how it looks, you can go back to the left part of the layer thumbnail to adjust the lightness or contrast to make the skin tones match and the color balance tool to match the color.
17. If there is a clear line between the skin tones, use the BLUR tool on the edges to smooth the layers in.
18. Save it as a Photoshop with all the layers (in case you see you need to adjust it later) AND a JPEG.
18. Once you are done and happy with how it looks, merge the layers by going to LAYERS > MERGE VISIBLE.
19. Save your work as lastname-firstname-layers-exercise.jpg in your finished projects folder.
AFTER you are done with the exercise, find a photograph that emulates what you want to be in ten years, according to your worksheet. For example, find a photograph of a veterinarian in their examination room, and use layer masks to switch faces. It should be the same as your initial goals sheet!
Photo 1. What you want to be as a career in ten years
Photo 2- With or as a celebrity
Save first as a Photoshop file to save on your desktop with both layers intact in case you need to make revisions.
Save as lastname-firstname-layermask1.jpg, lastname-firstname-layermask2.jpg
when you are done.
Go to Google Images and get a LARGE file. If you need help, the youtube video for getting a large file in Google is here
Follow steps 1-18 and save the work in the Layer Mask Folder in the Common Drive
 RSS Feed
