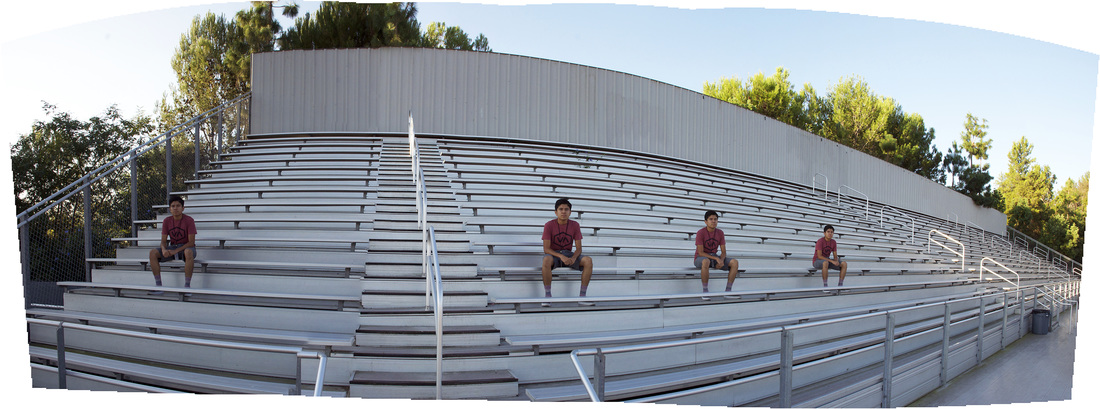
"The Sitting Man", Naomi Pazmino, Class of 2016
You and your partner will be shooting panoramic landscapes, using each other as models.
Shooting:
1. Find a setting that is long enough width wise to take five separate photographs.
2. Have your model stand (or sit) in the first frame all the way to your left, and take a photograph.
3. Move your camera to the right, with a small overlap of the last scene of about 40% and less then 70% (so the computer can figure out how to align the layers), and have your model move to your scene. Take another photograph.
4. Use only one focal length- don't zoom in and out as you are taking the photographs.
5. Keep the camera level and keep repeating until you have FIVE photographs of the scene, where your model is in each shot.
You and your partner will do five different scenarios (5 photos of each) for a total of 25 photos each. You will both model for each other.
iPhoto:
1. Download your photos in iPhoto and take the dust out of the sky by using the retouch tool.
2. Change the brightness/ contrast as needed to where the five photos that you are using for a landscape are even (i.e. make sure there's no particularly bright photos within the photos to lose the illusion).
3. Create a new photo album named 10-14-2015 Panorama by selecting all > file >new album. Make sure you only have your own photos and not your partner's in your album!
Photoshop
To create your panoramic photograph, do the following steps:
1. File > Automate > Photomerge
2. A box will come up- to the left select automatic set up (later you may want to adjust for different effects)
3. The box that says "Files" is where you upload your iPhoto images. Press "browse" and another box will come up.
4. Scroll down to photos then select last import and press command + click for your first set of five images for your landscape panorama, making sure they are of the same background.
5. Wait a minute or two for Photoshop to do it's magic of aligning layers then WHAA LAA.
6. If you are happy with how it came out, save your work as a PSD file by going
file > save as > lastname-firstname-panoramic1.psd and save in your FINISHED PROJECTS file under your student id.
7. AFTER you saved your work as a .psd with ALL the layers, then merge the layers and save as a jpg. by going Layers > merge visible. File > save as > lastname-firstname-panoramic1.jpg with the jpeg format selected.
8. Once your image is saved as a JPEG, you may do any other adjustments like brightness/contrast, color balance etc to get it to where you want it. You may also crop it to your best judgment.
9. Save your jpg in your FINISHED PROJECTS folder.
10. AFTER you finished saving your work in the finished projects folder, save it to the classroom folder as a jpeg.
11. RBV-Class1 > 231Common > Period # > 10-15-2015 Panorama folder
12. Put your top THREE panoramic in the class folder, losing each as lastname-firstname-panoramic1.jpg, lastname-firstname-panoramic2.jpg, and lastname-firstname-panoramic3.jpg.
More detailed instructions on Photomerge and the different settings from Adobe here.
Graded based on:
5 points: Time on Task, partnership ability, your model is in your photograph
5 points: Saved correctly as a jpg, lastname-firstname-panoramic1.jpg, with no spaces or incorrect spelling etc.
5 points: Photographs in focus, three panoramas were complete, model in each at least 2 times.
5 points: Craftsmanship with the Photoshop, photos not too dark or too light
 RSS Feed
