Mrs. Moncure CTE Photo Imaging I
@rbvphotos
  • Midyear Gallery 2018-2019
  • Photo 1 2018-2019
  • Photo 2 2018- 2019
  • Resources & Tutorials
  • Class Description
  • About the Teacher
  • Art Contests and Scholarships
  • Past Years Assignments
    • 2017- 2018 Assignments
    • 2016- 2017 Assignments
    • 2014- 2016 Classes
    • 2013- 2014 Schedule
    • 2012- 2013 Schedule
    • Midyear Gallery 2016- 2017
    • Midyear Gallery 2015-2016
    • Mid Year Photo Gallery 2014-2015
    • Mid Year Student Gallery- 2013-2014

Del Mar Fair Information

5/26/2014

0 Comments

 
The San Diego Fair at the Del Mar fairgrounds begins Saturday, June 7th and continues to July 6th.  Your matted photograph will be in the student showcase of photography on the first floor of the West Grandstand.  Last year all of my students' work were clustered together in one location, so I'm assuming it will be the same this year.  Once the fair is over, I will be picking up all of the student work and bringing it to school.  You can pick it up from me after the school year begins again in August.

Special Awards Reception for best in category (cell phone, color etc): Saturday, June 21st, 8:30am  
 
http://www.sdfair.com/pdf/2014_exhibits/student_showcase/2014StudentShowcaseInfo.pdf
Special contests: 
ONE DAY CONTESTS & WORKSHOP CLASSES (during Fair)
Contest space is limited. For reservations and information call 858-792-4207 ext. 2455 or email studentshowcase@sdfair.com.

The Arnie Ruskin Sit Down and Draw CAD Contest: Saturdays, June 7th, & June 14th, and Sundays, June 8th, & June 15th at 11:00am to 6:00pm in the Student Showcase Department

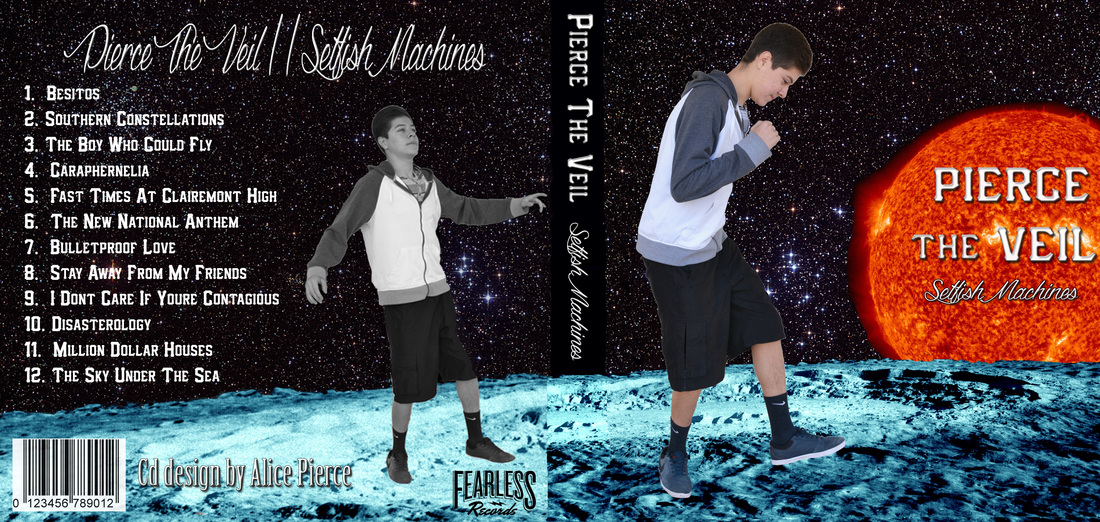
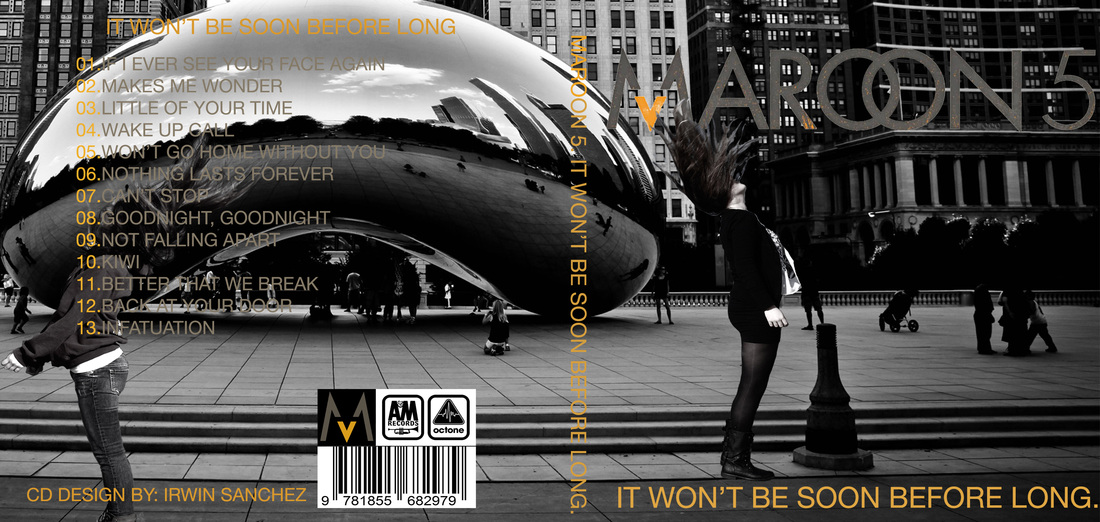
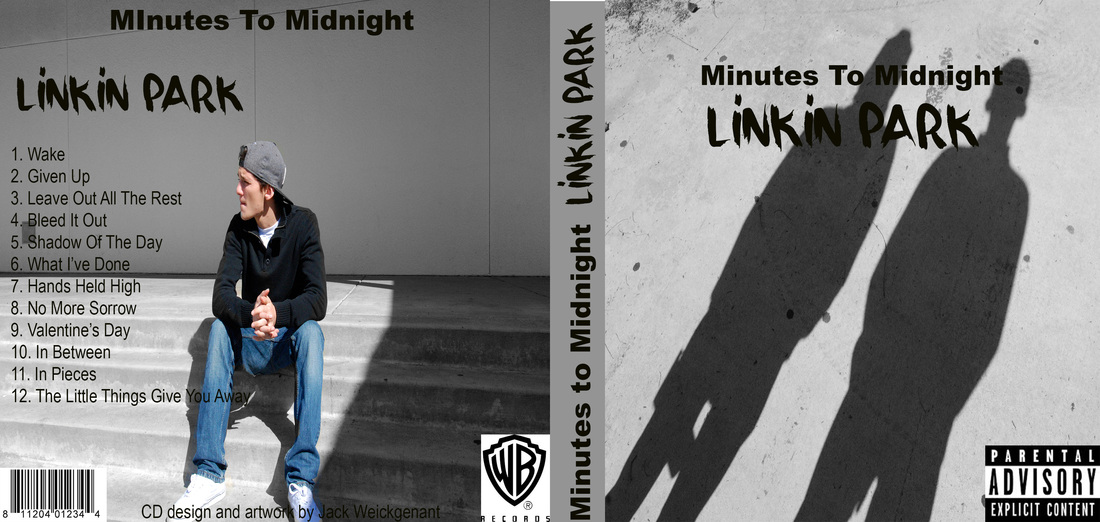
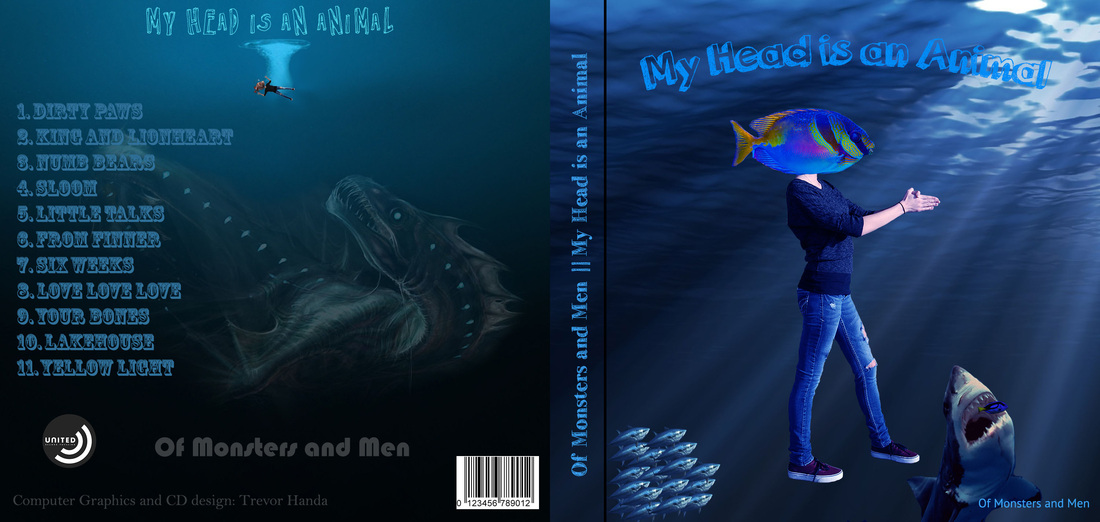
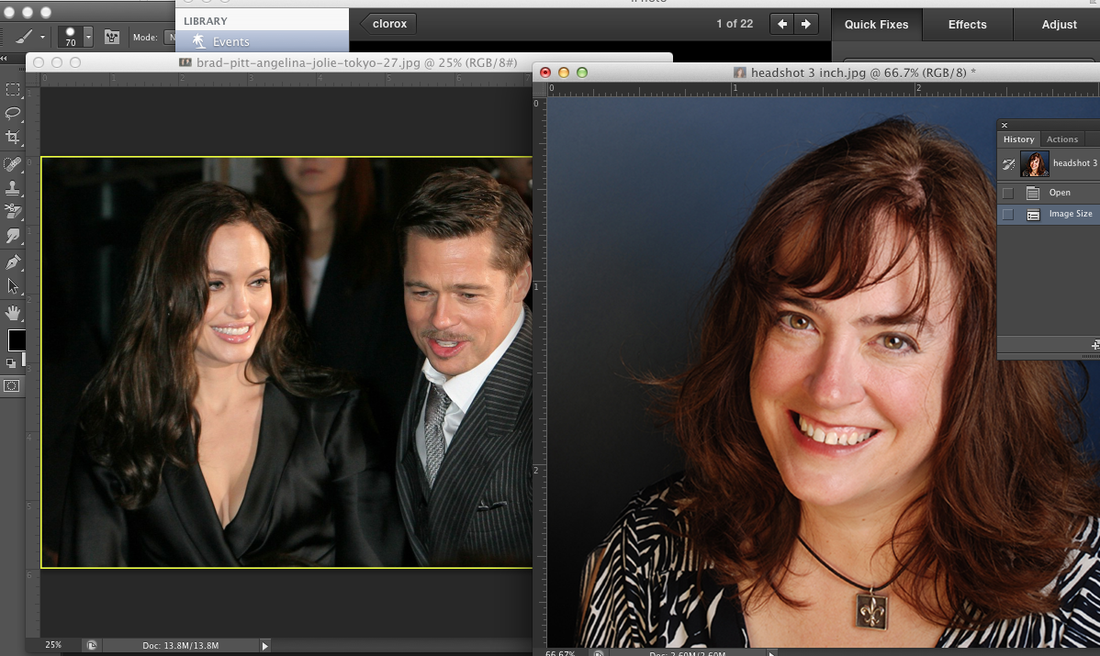
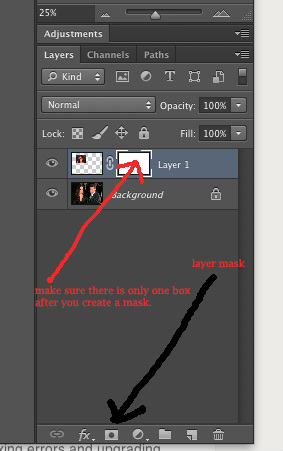
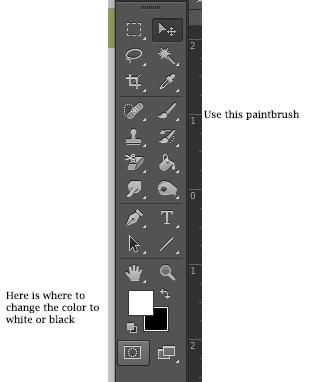
Photoshop Collage Challenge Contest: Students will be given five images to test creativity and skills in assembling a Photoshop collage. Timed event 1 hour. Saturday, June 14 and Sunday, June 15.

Summer Robotics Demonstrations:
Meet and learn about Robotics by Collegiate/Hobbyist. Space available June 14th, 15th, 21st, and 22nd for information contact: Cory at choover@swrise.org


FREE* photography workshops, open to the public (*free with paid admission to the fair)
Photo workshops

ENJOY YOUR SUMMER!!!
0 Comments

End of Year Survey

5/22/2014

0 Comments

 
Vista USD Survey Link: https://www.surveymonkey.com/s/FY13Vista


0 Comments

Stop Motion Video

5/19/2014

0 Comments

 
Stop Motion Video
You are going to create a 30 second to 1 minute long stop-motion video with your partner on the concept of one of the following code of conduct concepts:
Group A: Responsibility            
Group B: Plan Ahead                       
Group C: Be in class every day and on time
Group D: Honor School and personal property
Group E: Integrity
Group F: Treat yourself and others with respect
Group G: Be honest
Group H: Commitment
Group I: Achieve academic success
Group J: Participate in school activities and contribute to community
Group K: Maintain a focused effort
Group L: Stand up for what is right

Your story must have a beginning, middle and end with relatable music to tell the story of the concept assigned.

Since stop motion video is essentially several photographs sped up during a slide show to create the sense of movement, you will take numerous photos.

To get the stop motion feel, you will need to take 3 photographs per second- so, a 30 second video would be 90 images and a minute long stop motion video is 180 frames. 

Your video must have some illusion of animation- ie surfing across the football field, flying in the air, dancing shoes, drawing etc.  It takes time to do so- BE PATIENT.  The more time you plan and spend in the shooting stage, the better the final outcome.  

Take your photographs on a tripod, staying in one place.  You can do two different areas with your thirty seconds, just be sure they relate somehow.

IMPRESS ME!

To make your stop motion video in iMovie (see below for thumbnails):

1. File > new project > create 

2. File > project properties > initial photo placement > fit in frame (take off the Ken Burns style/ on bottom)

3. Click on the camera icon on the middle right hand side of iMovie > Drag the photographs from the stop motion into the top left workspace

4. Change the time duration between each slide by pressing on the wheel on the corner of one of the images.  Select "clip adjustments" and change the timing from the default of 4s to .3s and apply to all.

5. Preview how it looks by using the arrow button below the workspace- add or delete any photos that don't make sense 

6. Add music to the stop motion video by clicking on the music icon on the right hand side of iMovie and scroll down to sample what you want to use.  Drag the clip to the workspace on the top left.

7. TO SAVE: 

Share > Export using Quicktime > lastname.firstname.stopmotion.mov

STOP MOTION VIDEO THUMBNAILS
You must fill out the thumbnails (ok if stick figures) with your plan of beginning, transition to middle, middle, transition to end, then end.  Plan out how many frames will be needed for each section.  Make sure you take a photo of this so that you can upload it alongside with your final movie.

Graded on:
Time on task (10 points)
Teamwork (10 points)
Creativity (30 points)
Music (10 points)
Craftsmanship (all photos in focus) (10 points)
Story has a beginning, middle and end (20 points)
Story is 30 seconds to 1 minute (10 points)
These are the same instructions as above, just with thumbnails to guide you:

To begin iMovie, Go to file- create a new project with no theme.  Press "create".
Picture
2. File > project properties > initial photo placement > fit in frame (take off the Ken Burns style/ on bottom)
Picture
3. Click on the camera icon on the middle right hand side of iMovie > Press Control + Click to decide what photographs you'll be using.  Drag the photographs from the stop motion into the top left workspace to begin your project.
Picture
4. Change the time duration between each slide by pressing on the wheel on the corner of one of the images.  Change it to .3s and apply to all.
Picture
5. Preview how it looks by using the arrow button below the workspace- add or delete any photos that don't make sense 

6. Add music to the stop motion video by clicking on the music icon on the right hand side of iMovie and scroll down to sample what you want to use.  Drag the clip to the workspace on the top left.
Picture
7. TO SAVE: 
Share > Export using Quicktime > lastname.firstname.stopmotion.mov
0 Comments

Palomar Registration

5/13/2014

0 Comments

 
Here are the documents you need to register for Palomar College.  Remember, if you got a B or above BOTH semesters, you are eligible to get three college credits through Palomar!  These are UC accredited and should be transferable to the majority of colleges, you just have to speak with your advisor at whichever college you go to for the process.
palomar_college_application.pdf
File Size: 178 kb
File Type: pdf
Download File

online_enroll._instr..xls
File Size: 39 kb
File Type: xls
Download File

online_enrollment_for_palomar_college-2.pptx
File Size: 1885 kb
File Type: pptx
Download File

what_is_cte_transitions_articulation_and_free_college_credit.ppt
File Size: 117 kb
File Type: ppt
Download File

0 Comments

Photography Website

5/6/2014

0 Comments

 
Here is the website that you will be using as a template for your photography website http://www.artteacherlady.weebly.com
0 Comments

Photo Restoration

5/2/2014

0 Comments

 
Being able to restore a photograph is a great skill to have as a photographer!  There may be times that you need to scan and "bring back to life" a photograph that has been in the family and has torn, or restore a photograph that's been damaged through natural disasters such as hurricanes etc.  There are people that are professional photo restorers, and may spend days restoring a photograph.  For our purposes, we are going to use the tutorial below to restore a photograph.

Here is the website for the tutorial 
Do the steps listed to restore the photograph and save at 300 dpi.  Upload the before and after photos to My Big Campus along with an explanation of what you did to create the restoration.
0 Comments

READ Poster

3/13/2014

0 Comments

 
Picture
You are going to be working in groups of four to create two different READ posters, one using the studio lighting set up, and the other creating artwork in the style of Jan von Hollenben.  Bring in props to create something unique, stand out, and be remembered!
The specs are as follows:
Vertical format, 11" wide x 17" high with 300 resolution
You may use Photoshop to change the background of the studio lighting poster.
All team members must participate in the creation of the posters, helping with props, and modeling.
Graded based on:
Time on task (10 points)- actively engaged, using class time wisely
Active participation with your team (10 points)- doing your part and helping your teammates
Craftsmanship (10 points)- vertical, size and resolution correct, photograph tack sharp and in focus
Thumbnail sketches (10 points)- six creative ideas that were used as a springboard for the idea
READ font (10 points)- the font used for the poster emulated what the vision for the poster was
Creativity (50 points)- The posters were unique, made a statement, strong imagery, WOW factor!


Picture
Trevor Handa, Class of 2015
Picture
Amber Mularski, Class of 2014
Picture
Christopher Egoavil, Class of 2015 and Brianna Schaff, Class of 2014
Picture
Megan Anders, Class of 2014
Picture
Eileen Gomez, Class of 2014
Picture
Madison Irwin and Jessica Nettles, Class of 2014
Picture
Mariah Florence and Bailey Ivicevic, Class of 2014
0 Comments

Do Now

3/13/2014

0 Comments

 
Picture
Jan Von Hollenben
Please answer the following questions in complete sentences in your notebook:
1. What's going on in this photograph? 
2. What makes you say that?
3. What else can you find?
4. What sort of story do you think the artist was trying to portray?
5. How do you think he did this artwork?
0 Comments

CD Cover Design

2/10/2014

0 Comments

 
For this project, you will be working to create your own unique CD design in Photoshop, based off of an existing CD or one of your own design (for your band, etc).  You will be designing three components of a CD cover- front cover, spine, and back cover.

You must have the following items in your design:
1.     Start out by finding the pre-existing album cover to base your work on and print it out.
2.     You MUST begin with thumbnail sketches in pencil and show me your ideas before getting on the computer.  I need to see that you have fleshed out three different ideas for your cover, with the front and back covers working together to tell a story.
3.     Your case MUST have a resolution of 300 and the measurements must be done using the ruler to get:
        a.     Back cover : 5” w x 4.75” high
        b.     Front cover : 4.5” w x 4.75” high THIS IS ON THE RIGHT HAND SIDE AND SMALLER THAN BACK
        c.     Spine: .5" wide”  x 4.75” high
        d.     Note: the back cover, front cover, and spine must read as one document- so it’s 10” width x 
                4.75” high.  Use the guides to separate it accordingly.
4.     Your artwork MUST have at least two of your original photographs, emulating the style of the band. The photographs should include a manipulation of previous styles taught in class, either fast shutter speed, HDR, Selective Color, or Filters.  You must use the masking technique to combine any photographs with images found from the internet.
5.     Your CD case MUST emulate the band and music in style, both through the artwork and typeface.  You can download specific fonts from dafont.com, please ask me to show you how to download them!  Be sure it's a FREE font before trying to download it.
6.     Your case also MUST be completely different from the original CD artwork.
7.     Your CD case MUST have the following information:
        a.     Band name, Title of CD on all covers and spine (note: spine must have this information on
                it’s side).
         b.    Trademark of record label (ie Sony, MTV) and barcode
         c.    Song list on back cover
         d.   "CD Design by Your Name" on back cover
8.     Your work must include some transformation of text (through warping, scale, etc), and manipulation of your photograph (either through the tilt shift technique, HDR, multiple exposures, select color, etc). 

You will be graded as follows:
Time on Task- actively working (10 pts)
Measurements/ Resolution- all measurements and resolution done correctly (10 pts)
Front cover- dynamic graphics, name/title of artist and CD, well set up (30 pts)
Spine- right size, fonts reading correctly and to the side (10 pts)
Back cover- dynamic graphics, name/title of artist, song titles, well set up (20 pts)
Research and Thumbnail sketches- (20 pts)

Picture
Picture
Picture
Diego Rodriguez, Class of 2015
Picture
Yvette Moreno, Class of 2015
Picture
Brianna Cabrera, Class of 2014
Picture
Jesse Ortega, Class of 2014
Picture
Alice Pierce, Class of 2015
Picture
Irwin Sanchez, Class of 2015
Picture
Jack Weickgenant, Class of 2014
Picture
Trevor Handa, Class of 2014
Picture
Timothy Bunda, Class of 2014
Picture
Kendra Molano, Class of 2014
Picture
Yanely Bautista, Class of 2014
Picture
Camille Bassett, Class of 2015
Picture
Eileen Jones, Class of 2014
Picture
Ocean Rideaux, Class of 2015
Picture
David Muro, Class of 2015
0 Comments

Layer Masks

2/6/2014

0 Comments

 
Picture
Picture
Picture
David Muro, Class of 2014
The Layer Mask is the Photoshop Guru’s alternative to the Eraser tool. The Eraser tool is a destructive technique, whereas a Layer Mask can be easily corrected or removed altogether. 

The basic principle behind Layer Masks is black is see through and white is solid, so whatever area of your mask is black will effectively be "erased" from the image, unless you want it back, in which case you would just paint it white instead.

Click the Add Layer Mask icon at the bottom of the Layers palette to add a mask. A common technique is to use the brush tool to paint out the background of an image just as you would with the eraser tool. 

Steps:
1. Download both the Brad and Angelina and the headshot images from My Big Campus and open up in Photoshop.
2. Once they are open in Photoshop, make sure that they are both 300 resolution by selecting 
Image > Image Size.  You want to be sure they are both that size so that the image is clear enough for printing.
3. Move the headshot image to the side of the Photoshop workspace by clicking on the title and dragging it to the side.  
Picture
4. Move the headshot image onto the Brad and Angelina photo by clicking on the MOVE tool and dragging it to the top of Angelina's face.
5. Change the OPACITY of the headshot by clicking by the thumbnails of the layers and change it to 60%.
6. Flip the headshot face to match the direction of Angelina's face by pressing EDIT> TRANSFORM > FLIP HORIZONTAL.
7. Change the scale as needed to make it bigger or smaller by pressing EDIT > TRANSFORM > SCALE
8. Change the rotation as needed to make the chin fit better by pressing EDIT > TRANSFORM > ROTATE
9. Change the opacity of the top layer back to 100% by going back to the layer thumbnails.
10. Select the MASK tool at the bottom of the layer thumbnails- it looks like a rectangle with a circle in it.  Be sure that there are now TWO thumbnails in the top layer.
Picture
11. Choose the PAINTBRUSH tool (sometimes it's hidden under the pencil tool) and change the top color rectangle to BLACK.  You can switch it from black to white by pressing the arrow key just above the rectangles.
Picture
12. Use the paintbrush just like an eraser to take away information from the top layer.  Since it is a MASK, there is still information where you put down a mask (unlike a destructive way of doing it like an eraser).
13. To make the paintbrush smaller, press the [ button on the keyboard (under the delete button).  To make it
larger, press the ] button. 
14. You can see where you painted a mask on the second thumbnail for that layer.
15.  If you went too far and need to go back and show part of the original layer, switch the color to WHITE and paint over the area you want to show again. 
16. Once you are happy with how it looks, you can go back to the left part of the layer thumbnail to adjust the lightness or contrast to make the skin tones match.
17. If there is a clear line between the skin tones, use the BLUR tool on the edges to smooth the layers in.
18. Once you are done and happy with how it looks, merge the layers by going to LAYERS > MERGE VISIBLE.
19. Save your work as lastname-firstname-layers-exercise.jpg in your finished projects folder.

AFTER you are done with the exercise, find a celebrity you would like to be or be seen with by going to Google Images and get a LARGE file.  Follow steps 1-18 and save the work in the 02.07.2014 Celebrity Folder in the Common Drive and upload both the exercise and you and your celebrity in my Big Campus.  You will be doing THREE total celebrity photos.

0 Comments
<<Previous

    Author

    Mrs. Moncure's photo classes are the best!

    Archives

    May 2014
    March 2014
    February 2014
    January 2014
    December 2013
    November 2013
    October 2013
    September 2013
    August 2013

    Categories

    All

    RSS Feed

Powered by Create your own unique website with customizable templates.