Mrs. Moncure CTE Photo Imaging I
@rbvphotos
  • Midyear Gallery 2018-2019
  • Photo 1 2018-2019
  • Photo 2 2018- 2019
  • Resources & Tutorials
  • Class Description
  • About the Teacher
  • Art Contests and Scholarships
  • Past Years Assignments
    • 2017- 2018 Assignments
    • 2016- 2017 Assignments
    • 2014- 2016 Classes
    • 2013- 2014 Schedule
    • 2012- 2013 Schedule
    • Midyear Gallery 2016- 2017
    • Midyear Gallery 2015-2016
    • Mid Year Photo Gallery 2014-2015
    • Mid Year Student Gallery- 2013-2014

Food Photography

1/31/2017

0 Comments

 
Picture
Simon Ortega, Class of 2017
Picture
Ruby Hizazaga, Class of 2018
Picture
Merrik Polivka, Class of 2018
Picture
Kenia Hernandez Martinez, Class of 2017
Picture
Alexis Pedraza, Class of 2019
Picture
Angela Heltsley, Class of 2017
Picture
Itzel Molano, Class of 2017
Picture
Lauren Butler, Class of 2017
Picture
Tori Leavitt, Class of 2017
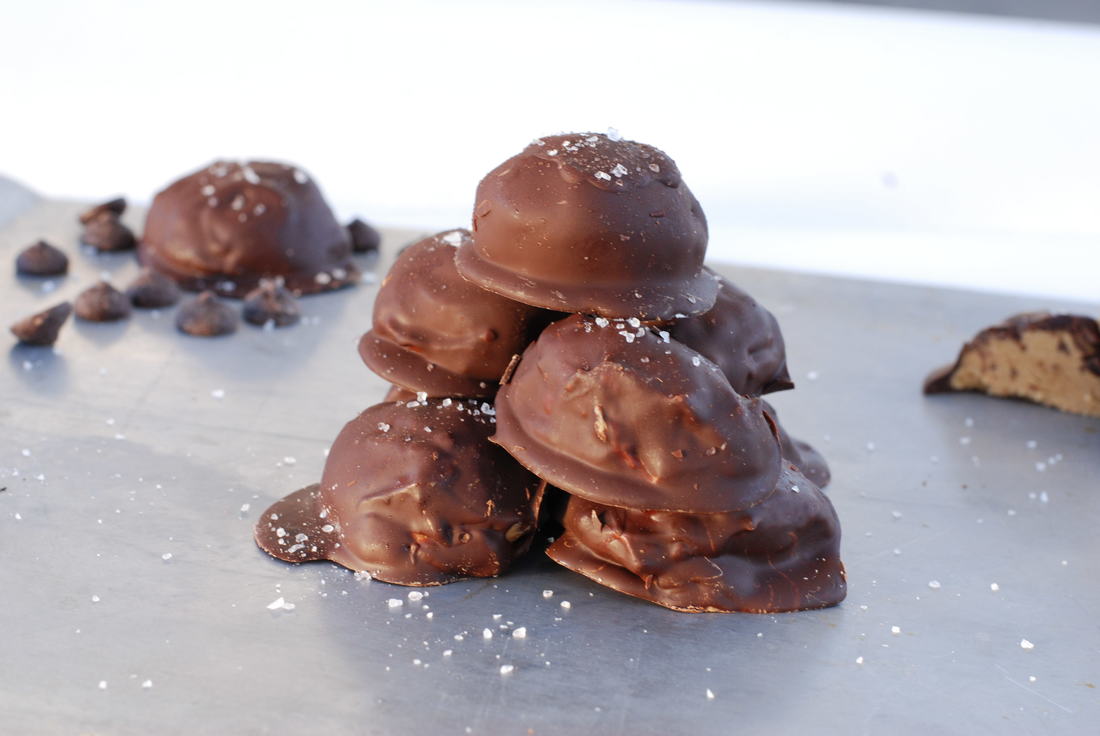
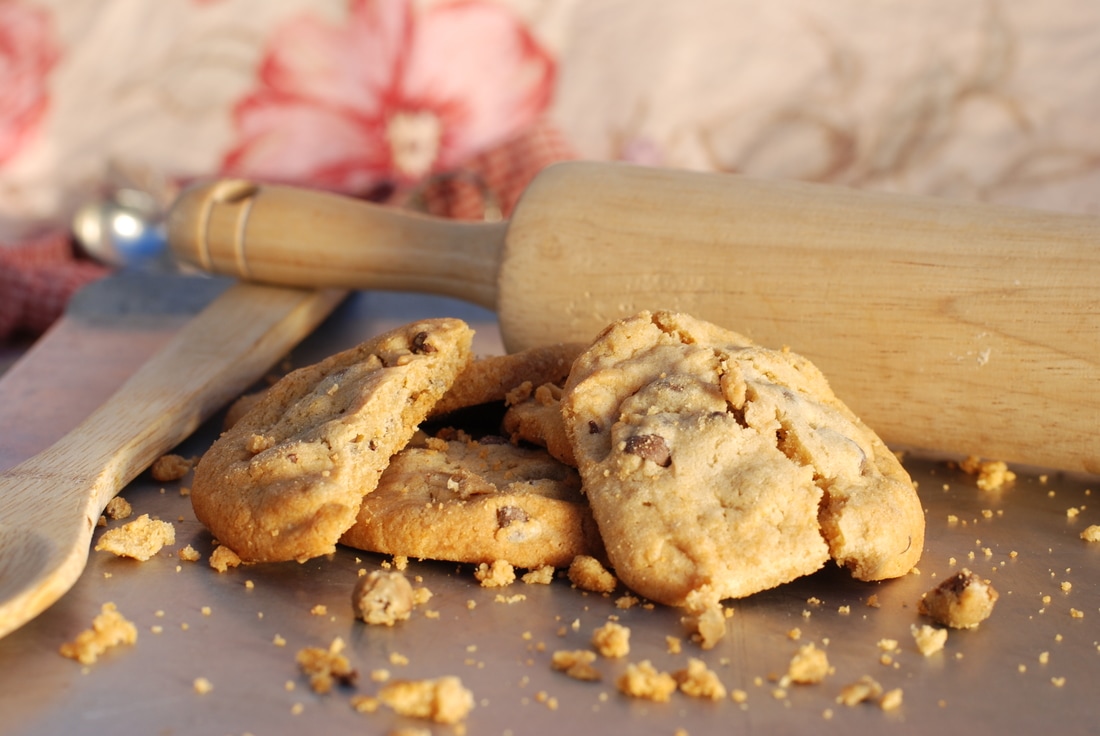
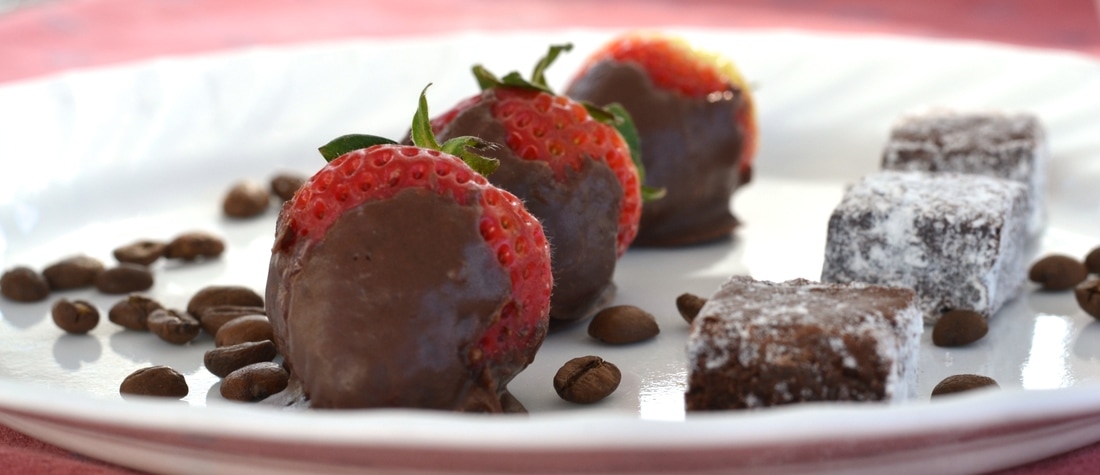
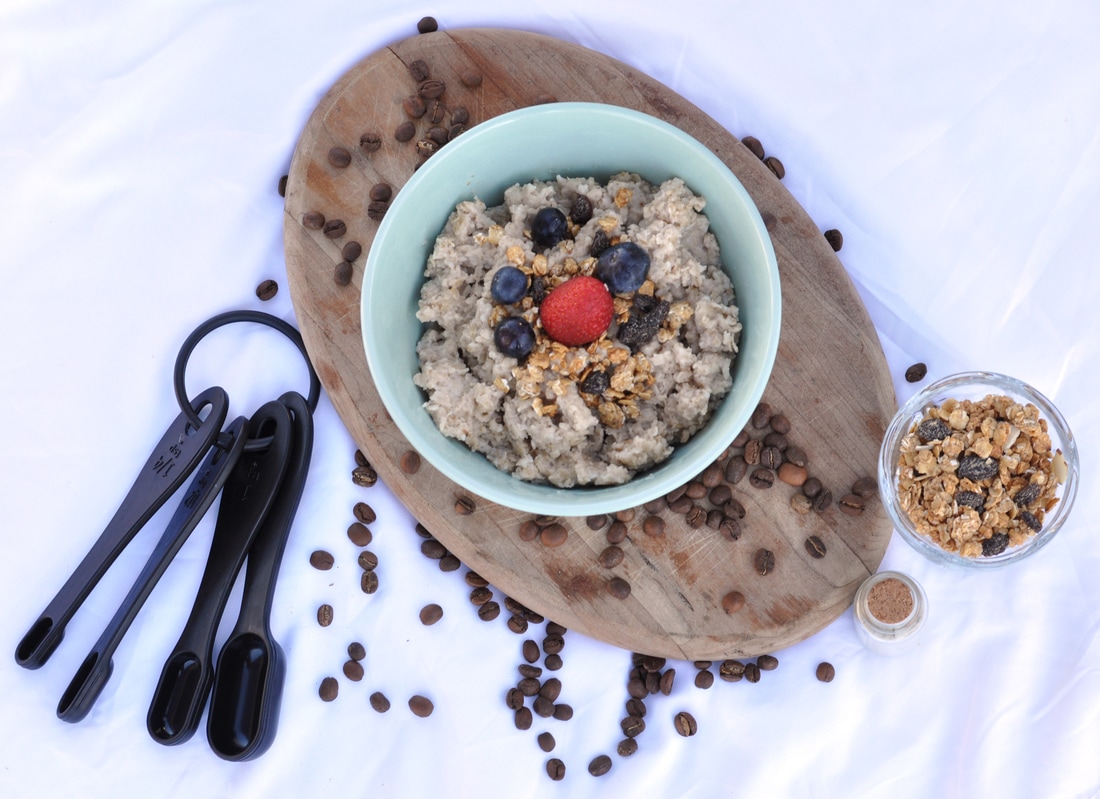
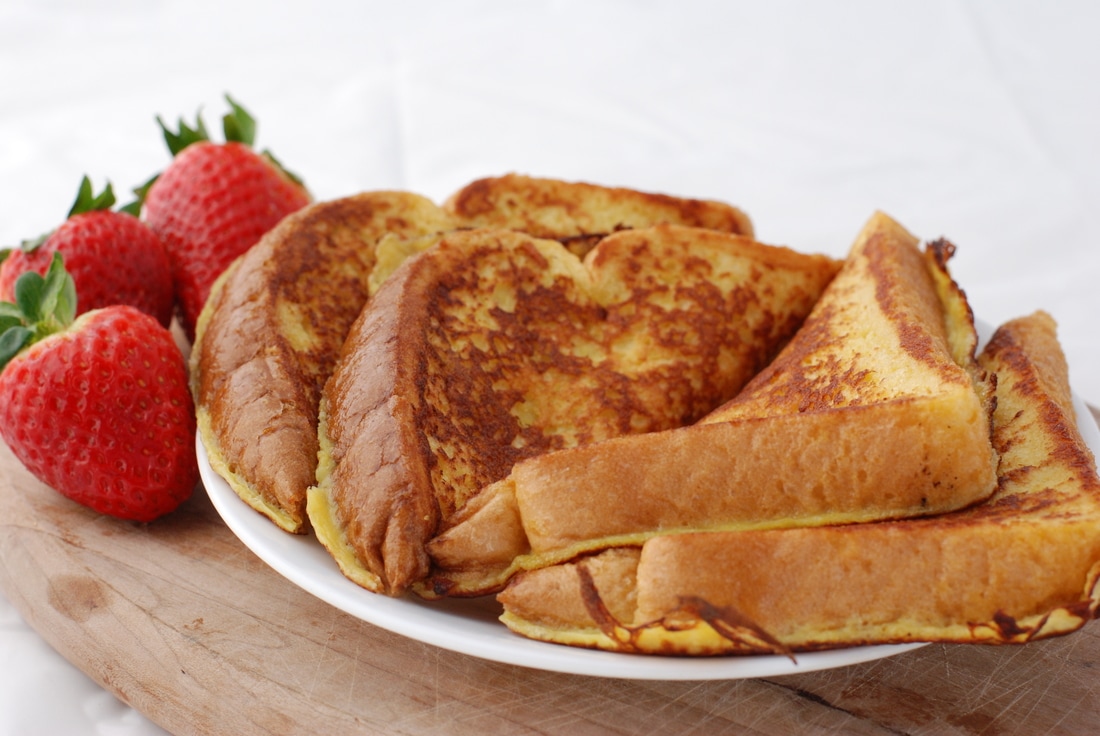
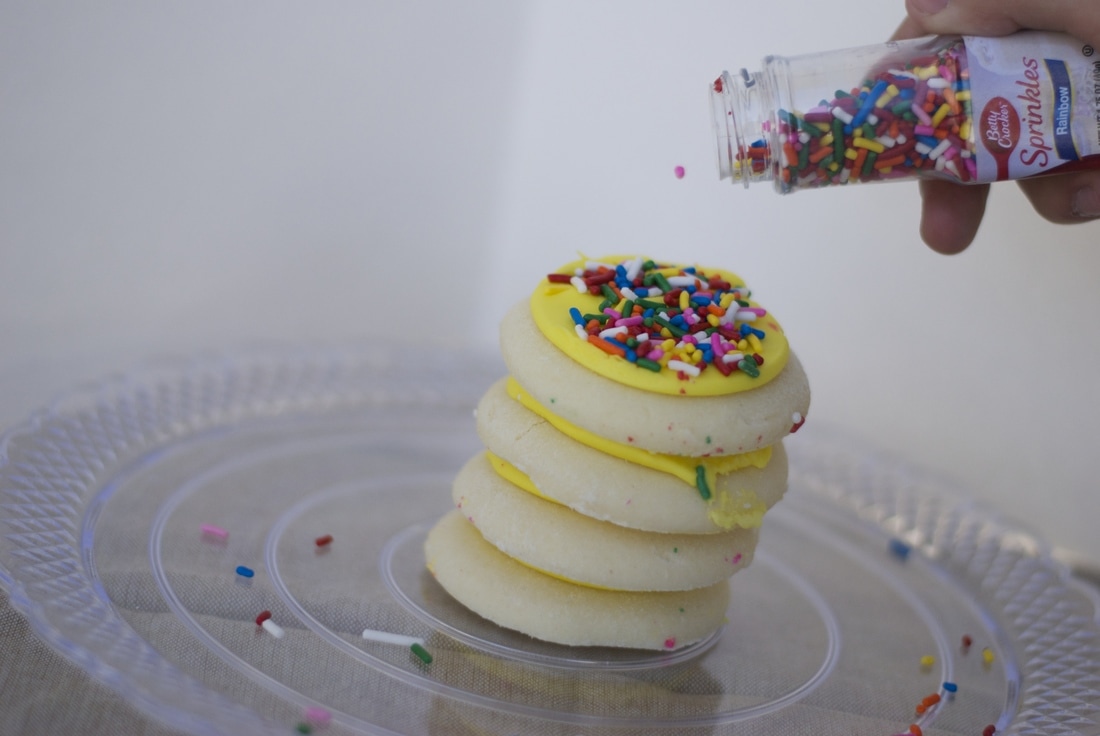
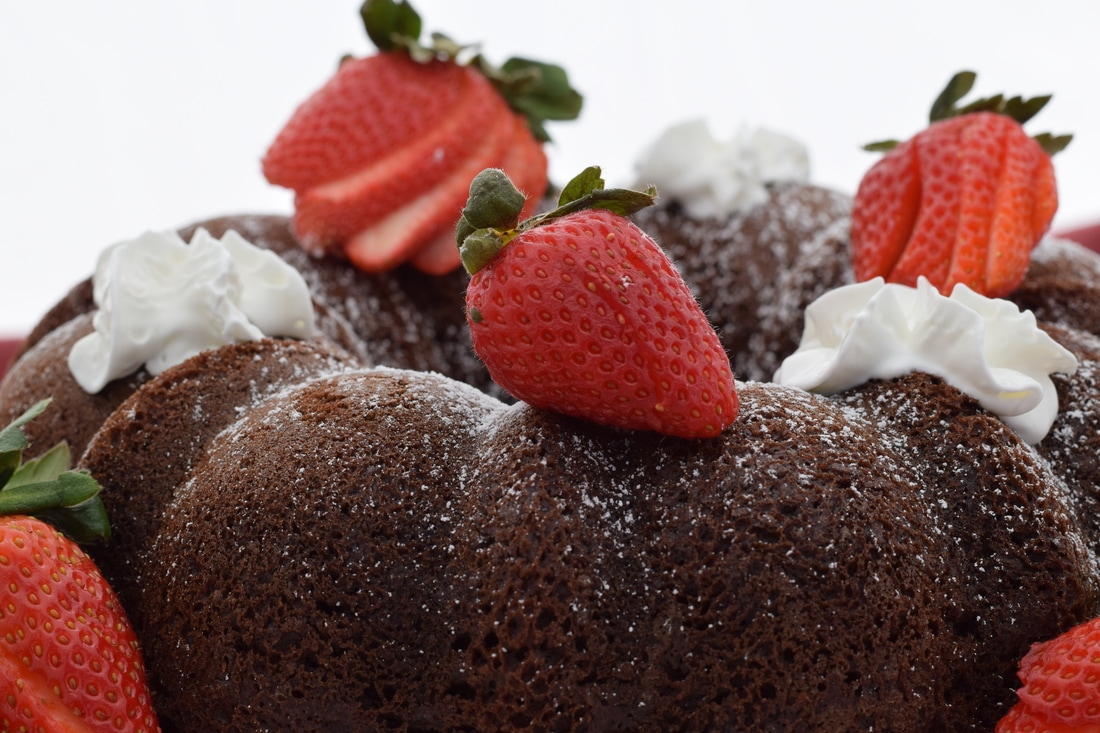
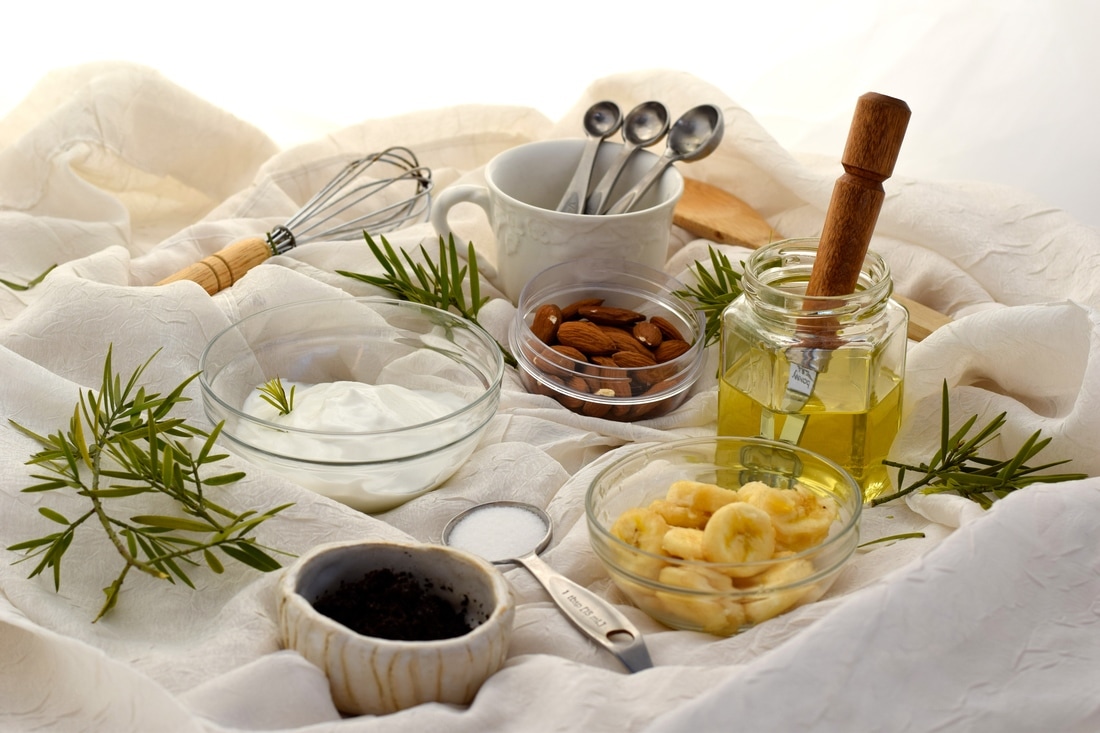
Put your top six (or more) photographs in the common drive in the 02-01-2017 Food folder, saved as lastname-firstname-food1.jpg, lastname-firstname-food2.jpg... Make sure there's variety in the photographs, not just exactly the same shot as before.

Make a new blog post named "Food Photography." Put your top six photos as large as possible, with a unique title, the aperture, ISO and shutter speed listed in the captions.

Answer the following questions in your blog post, using complete sentences and academic language.
1. What did you bring for your food? What did you use for props to make it special?
2. What are five things you learned from the food photography video and presentation about food photography that you didn't know before? Be specific.
3. What did you do to make your photograph look similar to the professional food photography shots?
4. What are three things you learned from doing the food photography project that you may not have known before or done before from taking the photographs? Be specific.
5. What are some careers or businesses that use food photography?
6. What do you think you were successful in doing with the food photography? Is this something you would do again? Why or why not? 
0 Comments

Name Project

1/23/2017

0 Comments

 
Picture
In this project, you will create a document of your name, using your digital camera to find representations of the alphabet.  For example, a side of a building hitting a sidewalk might make an L, or a key hole would make an O.  You have to use AT LEAST four letters for the assignment- if your name is shorter, please do your first name and last initial.  Take at least two separate pictures of your letters, in case one isn’t too exciting or is out of focus, etc.  PLEASE NOTE that if a picture is out of focus, there is nothing you can do in Photoshop to make it in focus! You will be creating a final document saved as lastname-firstname-nameproject.jpg

Youtube video on creating the project 

Steps:
1. Upload your images into iPhoto.  Command + click to select just the ones you want.
2. Choose the best photograph of each letter- make sure it's in focus- and use the editing function in iPhoto.
    a. Change the photo to black and white
    b. Adjust the brightness and contrast as needed- try to get all the letters similar brightness and contrast.
    c. Crop to the letter so there's no extraneous things outside of the letter- i.e. someone standing in the                    distance.

3. Go to your period number 231-Common folder. Open up your specific number needed and save it as your name immediately.  It will be called "Name-4-photo-template.psd or 5 photo template etc.  Make sure to rename it to lastname-firstname-nameproject.psd on your desktop so that other people can use it!

4.     Use the move tool to move the first cropped and desaturated letter from the iPhoto thumbnail to make a new layer. Adjust as needed. CHECK when done. Try to make all the letters the same height and width by using the guides as needed (which is by the rulers).

5.     Open up the second letter in Photoshop.  Do the same as the above until you are done bringing over letters.

6.     If you need to change the size of any of the letters, you may use the “transform” key.  Use the pull down menu under “edit” and then go to “transform” then “scale”.  You need to change the size to fit in the appropriate box, then apply it by clicking on the check key to commit.  

7.     Note that if you want to make changes to any of the individual letters, you need to select the correct layer in order to be able to make them!

8.     Keep saving your work as a Photoshop file (the name.psd) - once it’s saved as a jpeg, you can’t work with it again because it will merge the layers and you won’t be able to work on it further!  

9. Save your work as a Photoshop file by going Save as > Lastname-firstname-nameproject.psd and save it within your FINISHED PROJECTS folder within your personal student folder.  If you can't get to your folder from the Save as field, save to your desktop and drag it into it.

10.  AFTER you have saved your work as a Photoshop file, merge all layers using Layer> merge visible.  Save as a jpeg titling it as your lastname-firstname-nameproject.jpg and keep it in your finished project folder on your desktop.  

11. Save your work as lastname-firstname-nameproject.jpg in 
RBV-Class1 > 231Common> Period # > 01-26-2017 Name Project.  

12. Create a new blog post called "Name Project"

13. Under description write a self reflection using complete sentences, in paragraph form, and not cut and paste from the instructions.  Answer the following in six or more sentences: 
1. What steps you did in Photoshop to create your project- be clear and concise and don't copy/paste from this website/ use your own words!
2. What steps were you unclear on and struggled with (both in taking photos and in Photoshop)
3. What steps you were proud of figuring out
4. What you like best about your artwork
5. What you think you could have improved about your artwork
0 Comments

Layer Masks

1/4/2017

0 Comments

 
Picture
Ari Gonzalez, Class of 2017
Picture
Trey Wilcher, Class of 2017
You will be creating three layer masks for this project- one exercise, one as yourself in your ideal career, and lastly one with you as a celebrity/ with a celebrity.

Go to Google Images and get LARGE files to use for your background.  Make sure they are not pixelated/ have a copyright symbol on them. The youtube video for getting a large file in Google is here 
Save your image as a jpg file on your desktop.
Make sure the image you choose is of your dream profession (or dream place to live) in a setting such as in a doctor's office, i.e. not just a man with a white background wearing a tux.

You will be creating a new blog post as "Layer Mask" and have your two images- the top one with yourself in the career you want along with a paragraph explaining what your career is and your ideal day, the bottom one with a celebrity and a reflection on why you chose this celebrity and steps you did in photoshop to create it.

The image exercise will be saved as lastname-firstname-layermask-exercise. The other images are to be saved in the common drive as lastname-firstname-layermask1.jpg and lastname-firstname-layermask2.com.
​
Layer mask tutorial 

Graded based on:
Time on task: 5 points
1 pt/ came to class on time daily 
1 pt/ worked quietly on the computer and asked for help as needed 
1 pt/ did not disrupt class by wandering around room or talking a lot 
1 pt/ no cell phone use
1 pt/ used time wisely and worked hard daily

Computer work: 5 points
1 pt/saved work as photoshop file with both layers on your desktop 
1 pt/ saved work as merged layers as a jpeg on your desktop AND handed in the common drive
1 pt/ lastname-firstname-layermask-exercise.jpg in common drive
1 pt/saved as lastname-firstname-layermask1.jpg in common drive
1 pt/ lastname-firstname-layermask2.jpg in common drive

Craftsmanship: 5 points
1 pt/ images used from the web not pixelated/large file and no copyright symbols
1 pt/ layer work neatly done in Photoshop, attention to detail and edges
1 pt/ good illusion done in the exercise image-  
size of the head is right, good angle, color balance correct​
1 pt/ good illusion of yourself in the photograph 1- size of the head is right, good angle, color balance correct
1 pt/ good illusion of yourself in the photograph 2- size of the head is right, good angle, color balance correct

Website: 5 points
1 pt/ created new blog post on home page called "Layer Mask."
1 pt/ both images on the website
1 pt/ paragraph (or longer) explanation underneath your image of self in 10 years of what you are doing/ where you are according to the worksheet- what your visualization was.
1 pt/ paragraph (or longer) explanation underneath your image of yourself as or with a celebrity about who you are and what you are doing 
1 pt/ specific steps on how you created image in Photoshop not just copied and pasted from this website or too short. Must be at least five sentences.
0 Comments

    Author

    Kelly Moncure, the teacher of creative, smart and strong photography students!

    Archives

    June 2017
    May 2017
    April 2017
    March 2017
    February 2017
    January 2017
    December 2016
    November 2016
    October 2016
    September 2016
    August 2016

    Categories

    All
    Aperture Exercise
    Artist As Mentor
    Camera Obscura
    Climate Change Art Contest
    Cloning And Content Aware
    Compositing In Photoshop
    Composition Techniques
    Copyright
    Daguerrotype And Cyanotype
    David Hockney
    Del Mar Fair
    Do Now 9/11
    Elements Of Art Assignment
    Elements & Principles Of Art
    Fast Shutter Speed
    Flying
    Food Photography
    Halloween Photographs
    HDR Procedure
    Layer Masks
    Light Painting
    Lightroom Project
    Magazine Cover
    Mandalas
    Midterm Review
    Moon Photography
    Name Project
    Nikon Diagram Identification
    Palomar College Sign Up
    Places To Photograph In San Diego
    Portfolio
    Principles Of Art Assignment
    Red Ribbon Photo Contest
    Red Ribbon Winners
    Reflections Contest
    Remind.com
    School Arts Magazine
    Shutter Speed Exercise
    Silly Class Photo
    Sports Photography
    Student Blog Instructions
    Student Websites
    Surrealistic Self Portraits
    Tablet Instructions
    Tessellations
    Toy Story
    UCCI Teacher Spotlight
    Uploading To Padlet Instructions

    RSS Feed

Powered by Create your own unique website with customizable templates.